Specifying/Registering Scan Sizes
You can manually specify a scan size when scanning originals that cannot be detected using [Auto Size]. You can also store the specified scan size.
Scan Size Settings
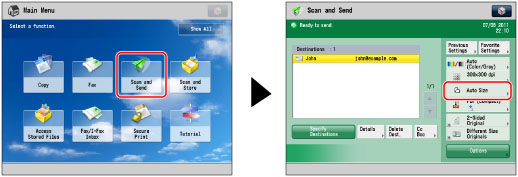
Press [Scan and Send] → specify the destination → press the scan size button.
Select the desired scan size.

If you want to scan a standard scan size:
Select the desired scan size.
If you want to select a nonstandard scan size longer than 11" x 17":
Press [Long Original].
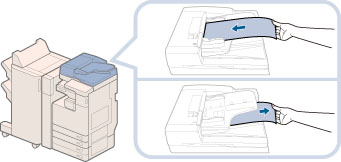
If you want to scan long originals whose width is 17" to 24 7/8" (432 mm to 630 mm), press [Long Original].
If you scan long originals, whose width is 17" to 24 7/8" (432 mm to 630 mm), support originals by hand when feeding and outputting paper.
If you want to select a nonstandard scan size smaller than 11" x 17":
Press [Free Size].
You can scan two-sided originals.
If you want to scan a nonstandard scan size:
Press [Custom].
Press [X] and [Y] → use the numeric keys to enter the scan size in mm → press [OK].

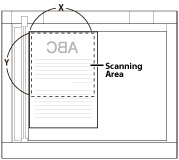
Platen Glass
If you want to scan a registered scan size:
Press [Custom] → select [Registered Size 1] or [Registered Size 2] → press [OK].
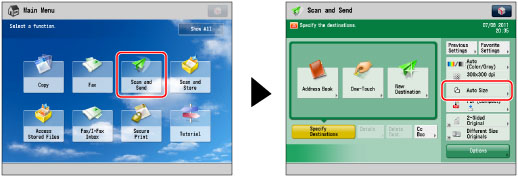
Press [Scan and Send] → press the scan size button.
Press [Custom].

Press [Register Size] → [Registered Size 1] or [Registered Size 2].

Press [X] and [Y] → enter the scan size in mm → press [OK].
Press [Cancel Settings] → [Cancel].
You cannot select [Auto] when scanning the following types of originals. Select the desired scan size.
